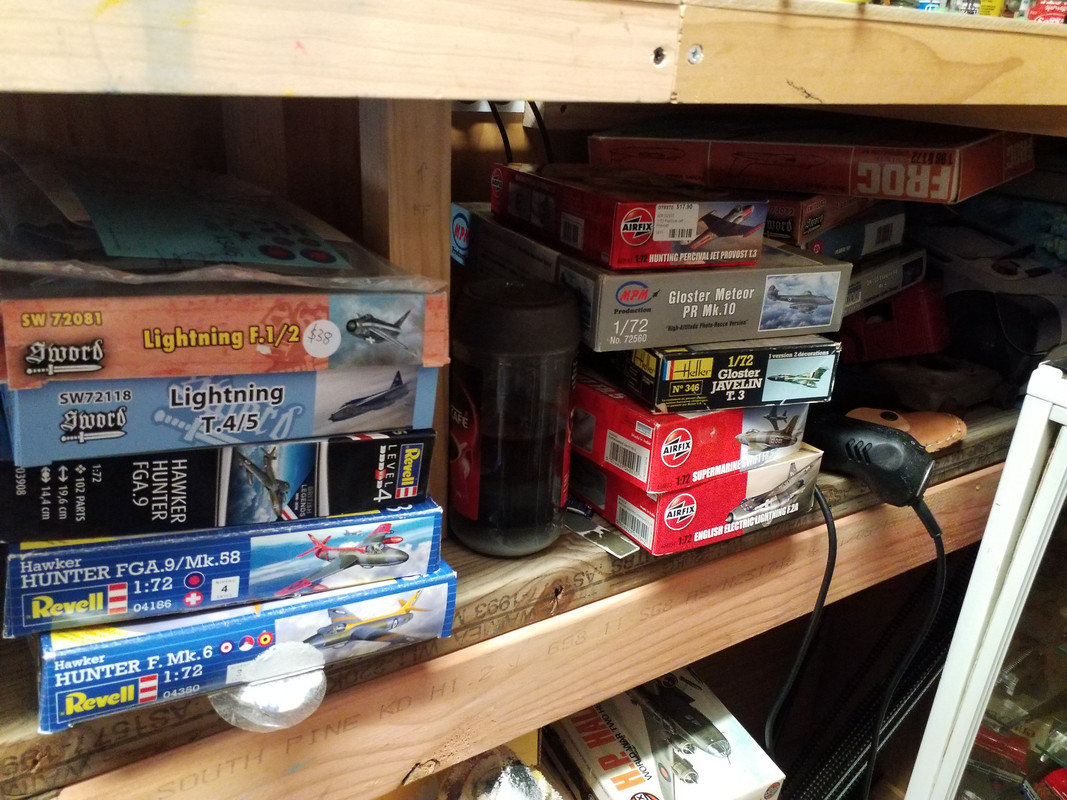
EE Lightning Build 1/72. Warning: Pic Heavy

A forum for everything else that does not fit into the other categories

EE Lightning Build 1/72. Warning: Pic Heavy

Postby chopper_nut » Mon Jul 04, 2022 4:47 pm

I managed to clear some space in the cabinet so I figured that I could start another kit. I've had the Sword single seat Lightnings for a little while and they don't take up as much room as some of the other ones in the pile (Javelin and Canberra). I intend to put as many photos up of this build to try to encourage other people to showcase their builds and to show some of the process for people just starting out. It's not as scary as it seems...

Image
The stash

Image
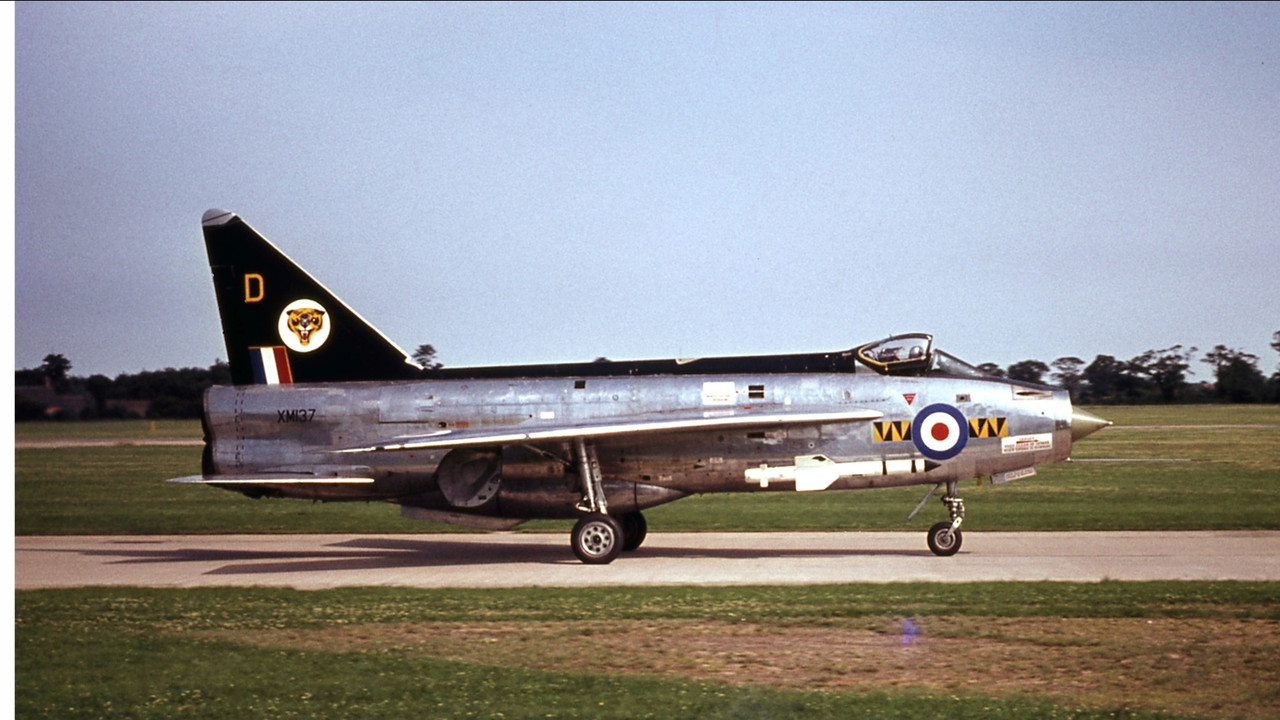
I decided on the F1/F2 kit as opposed to the F3 or two seater as I wanted to do an early tall tail version.

Image
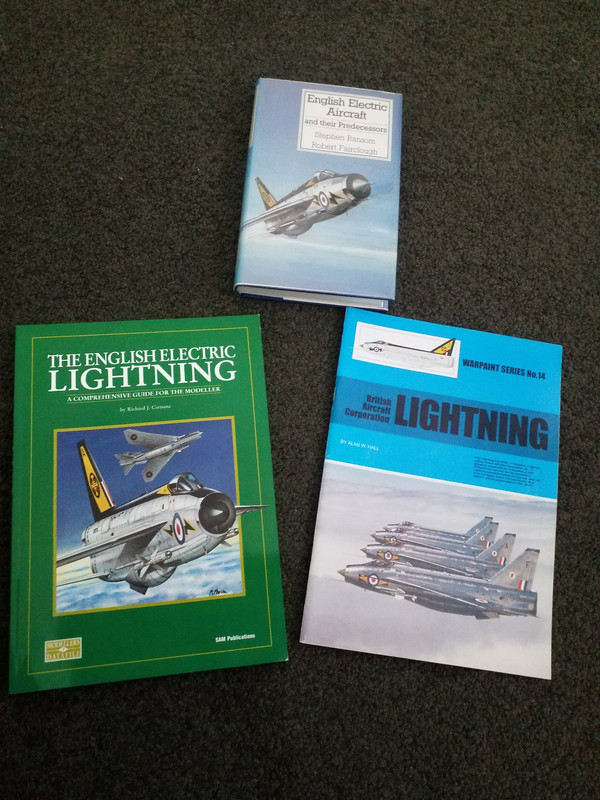
First thing, gather and study and reference material.

Image
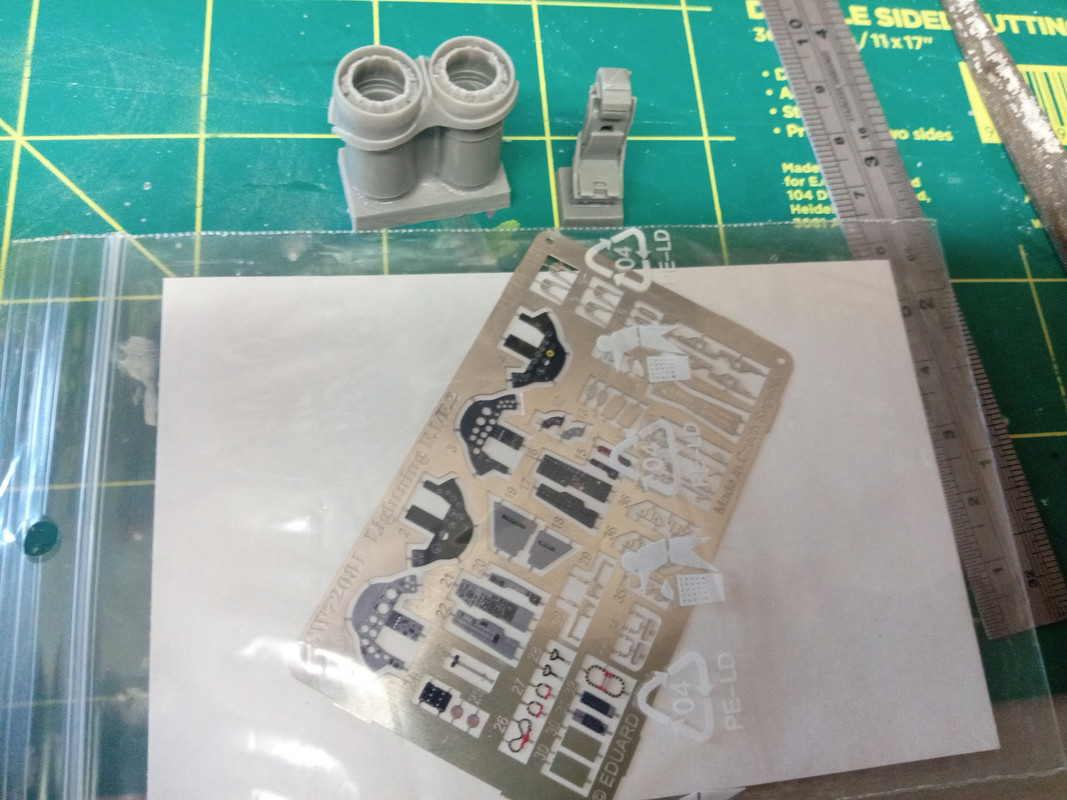
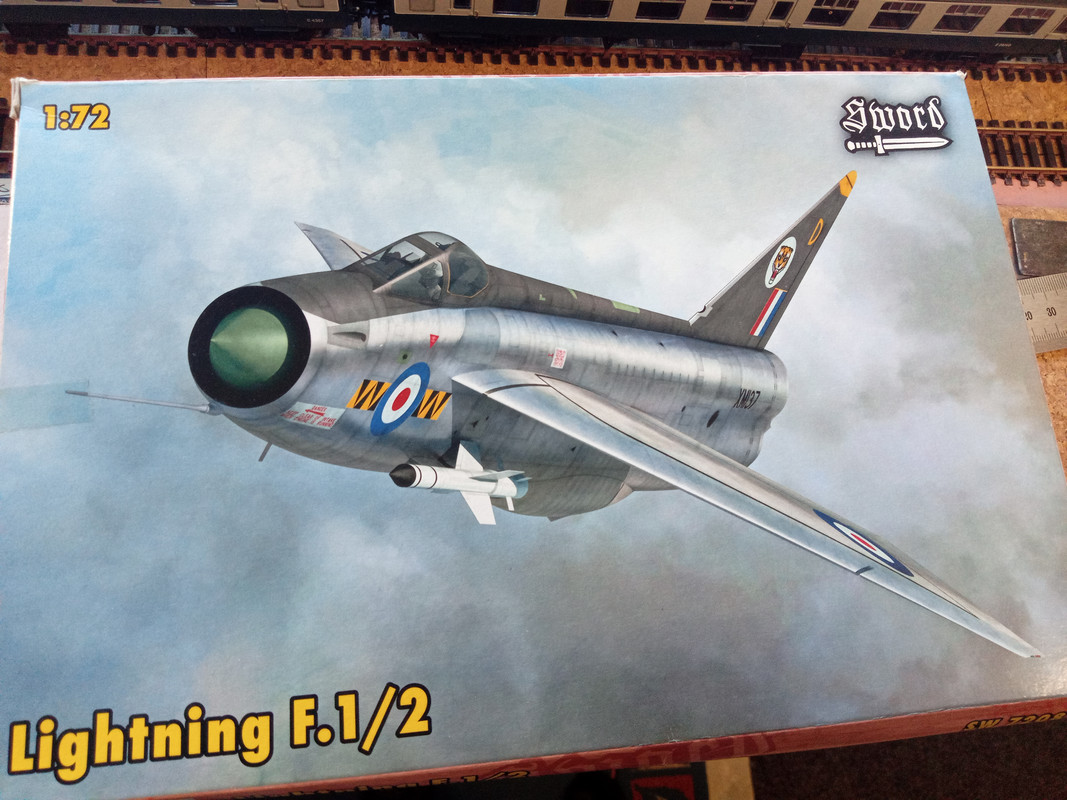
The kit comes with coloured photo etch and resin. Not sure how much of this PE I'll use in the end.

Image
Image
Interestingly, very similar to the Airfix design.

Image
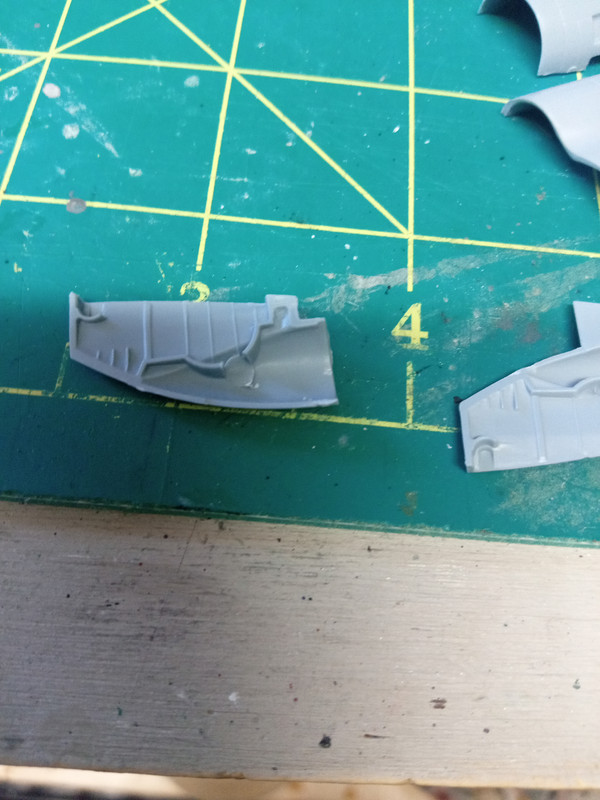
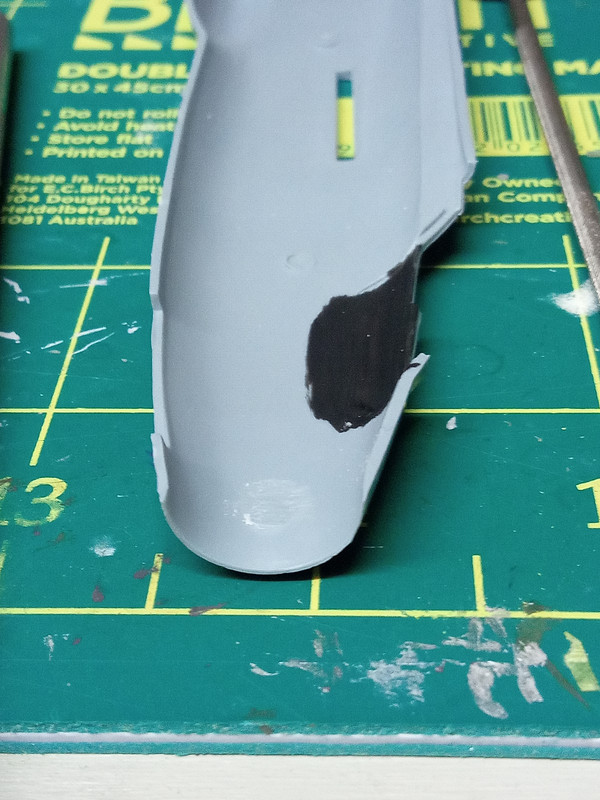
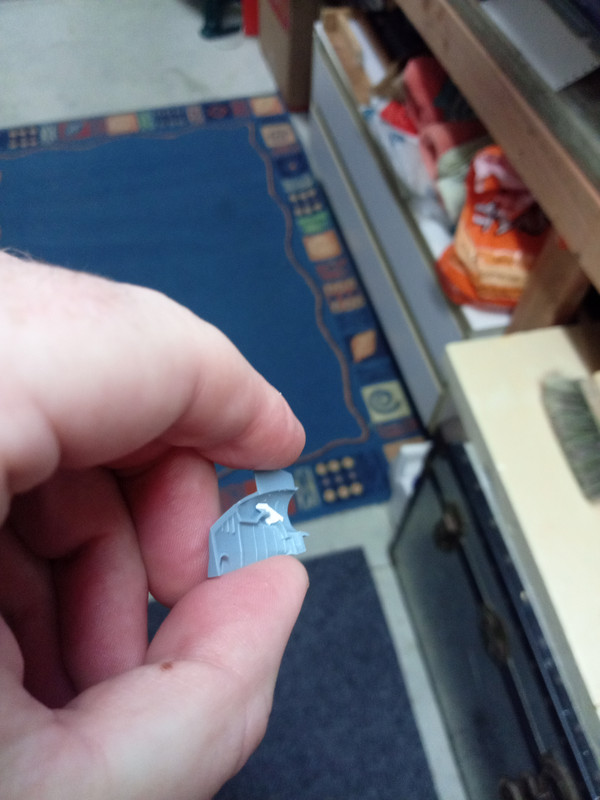
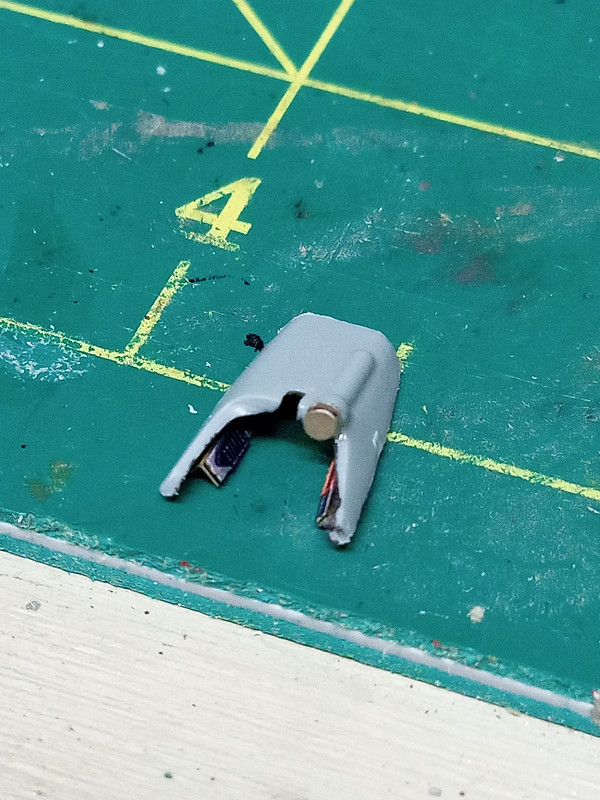
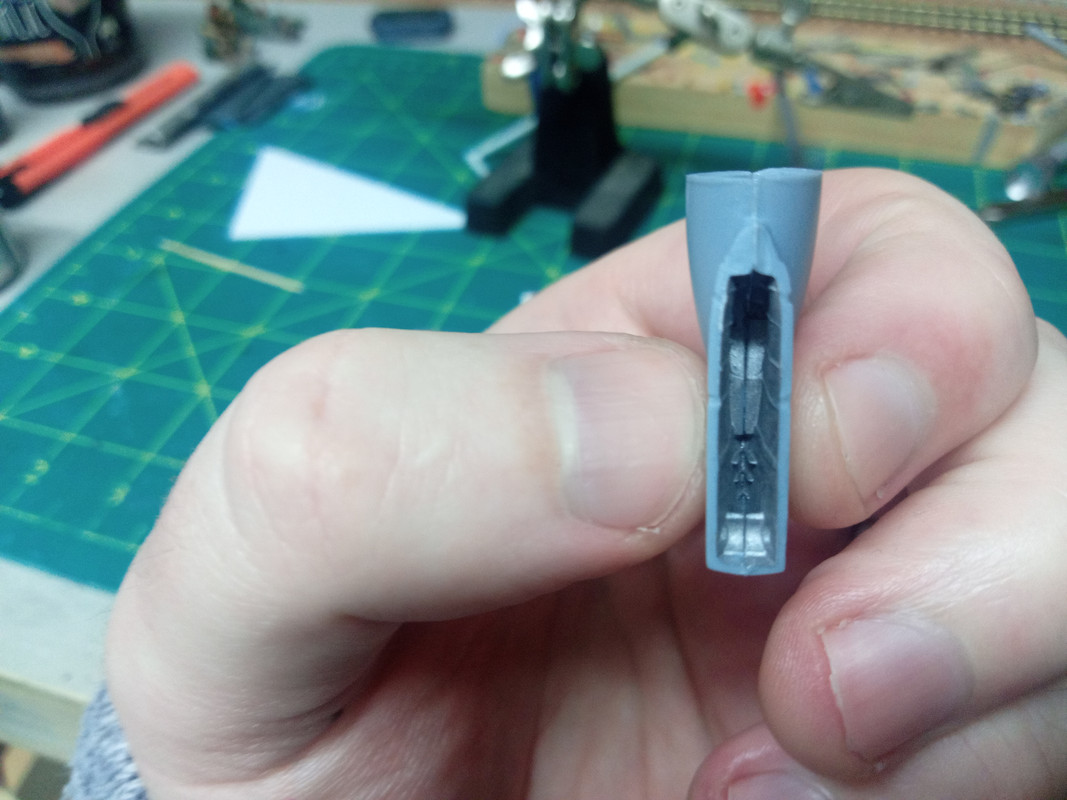
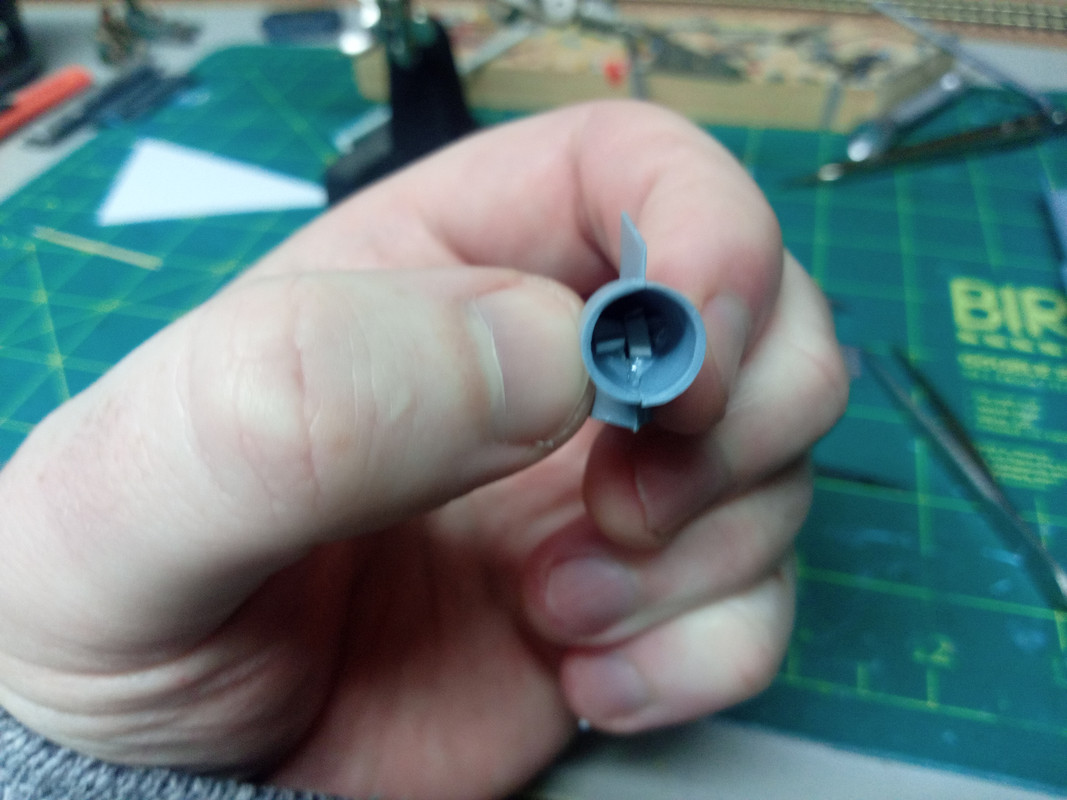
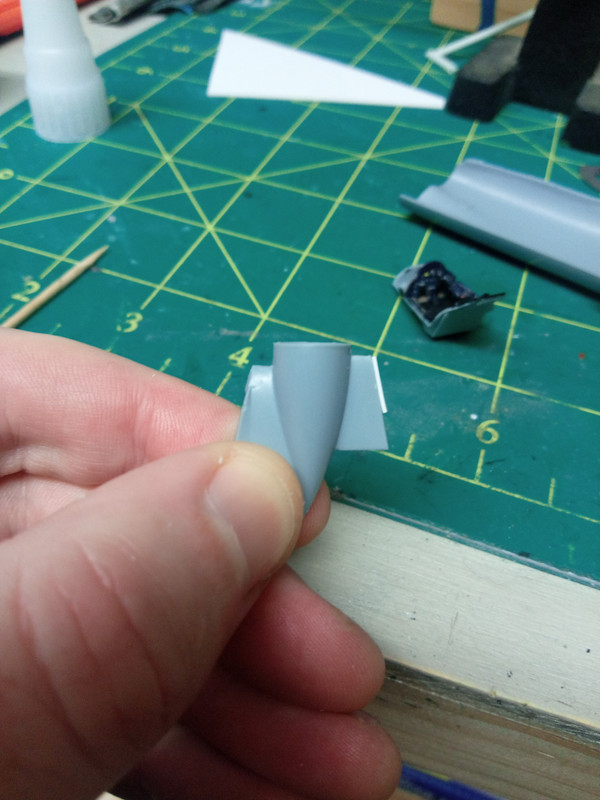
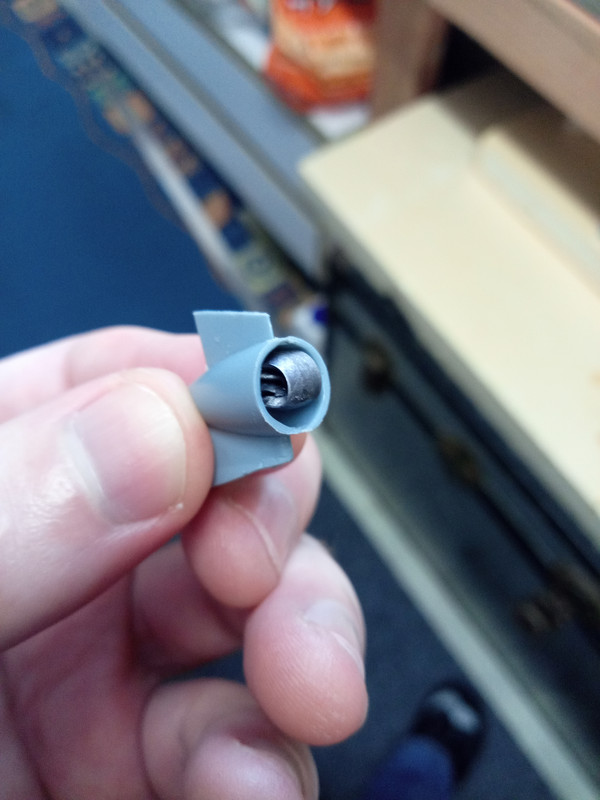
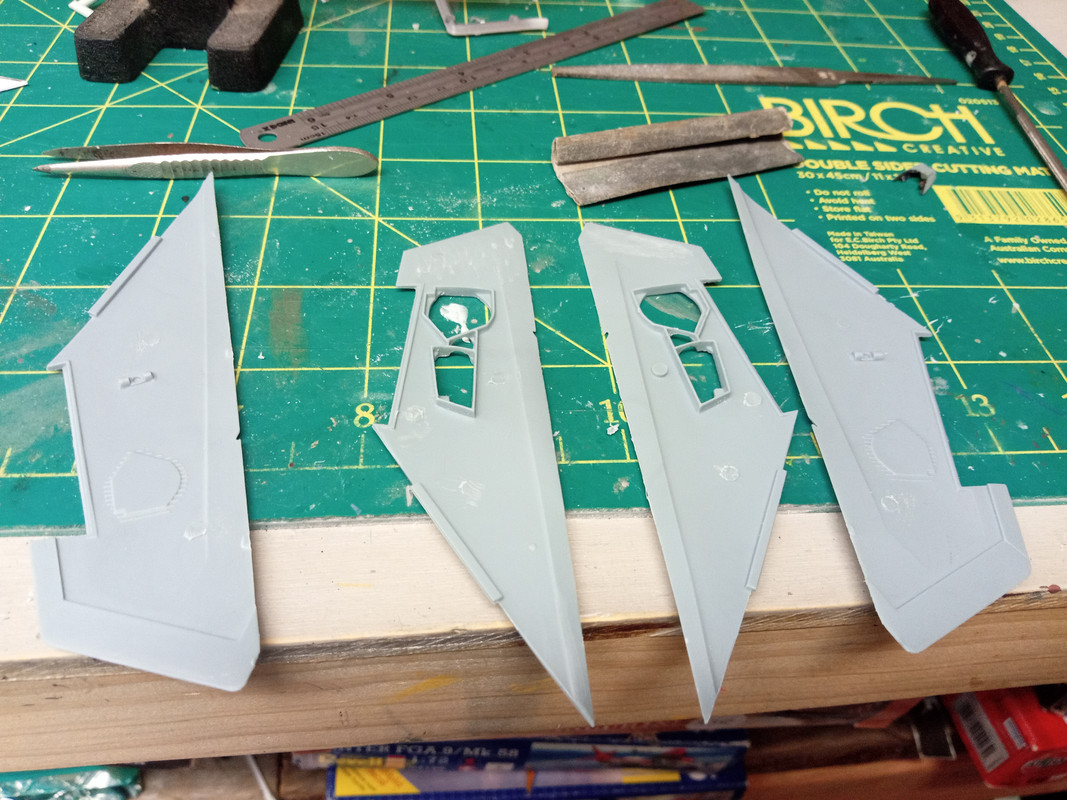
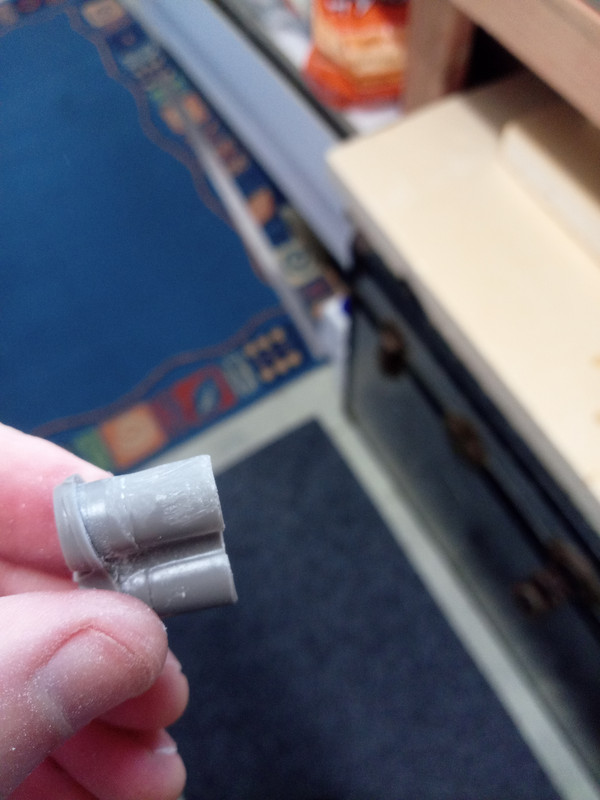
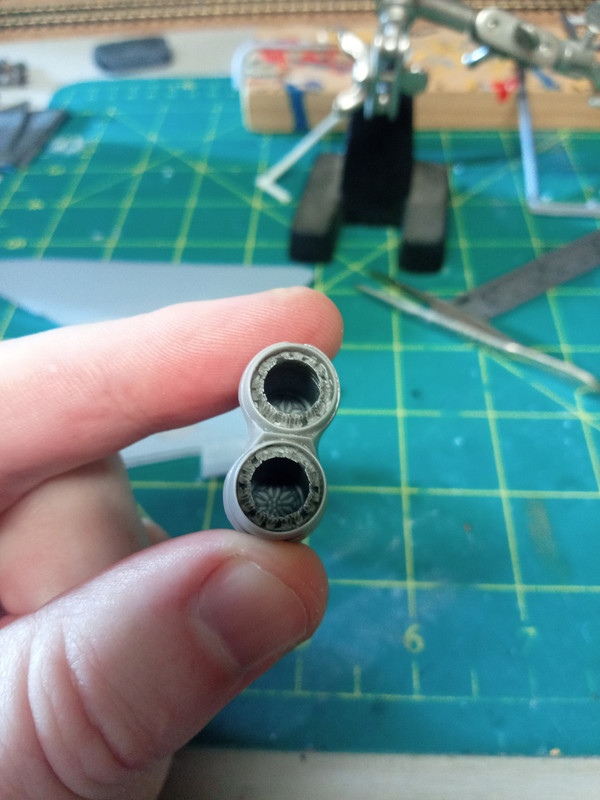
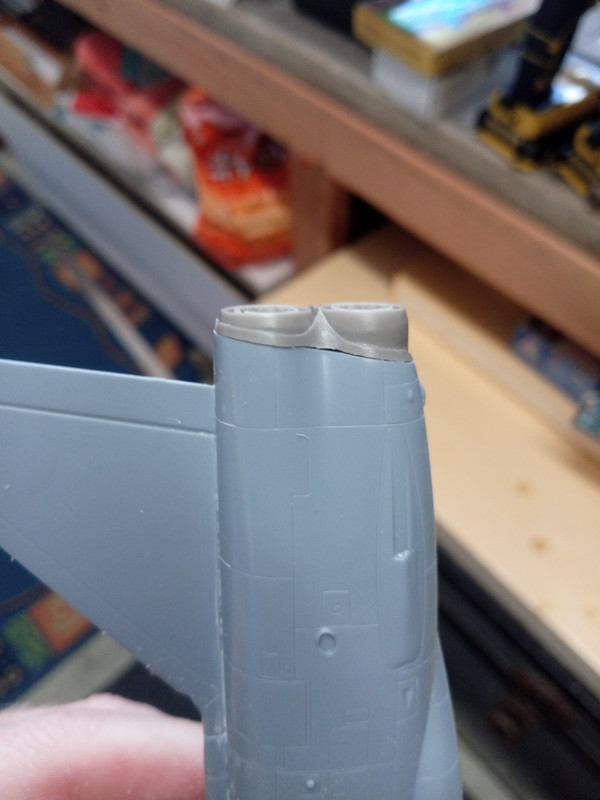
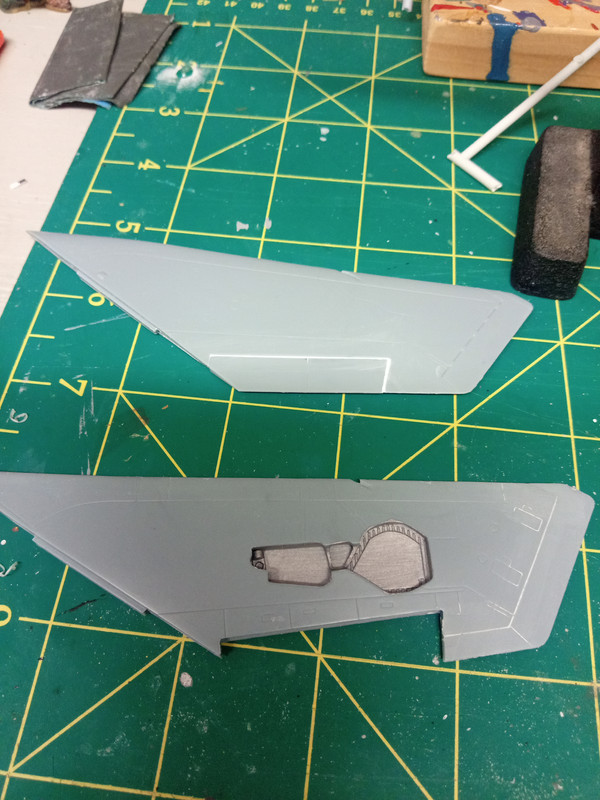
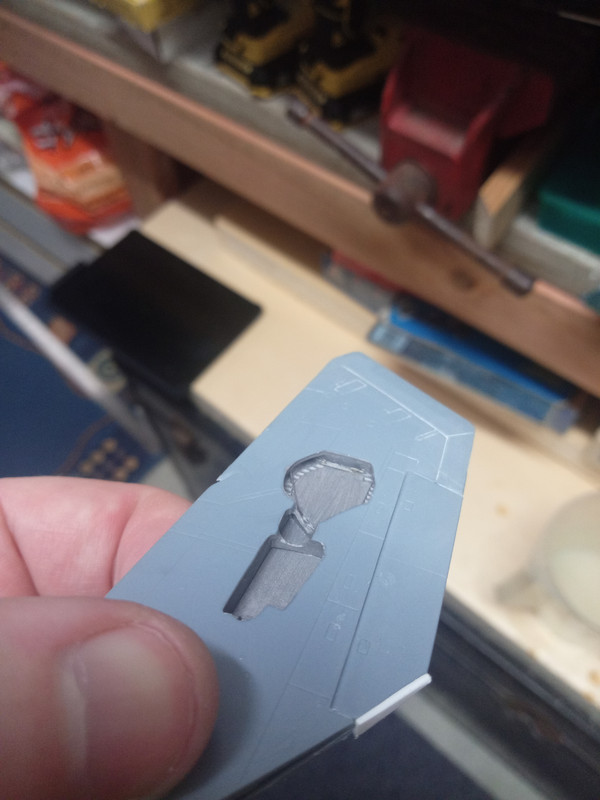
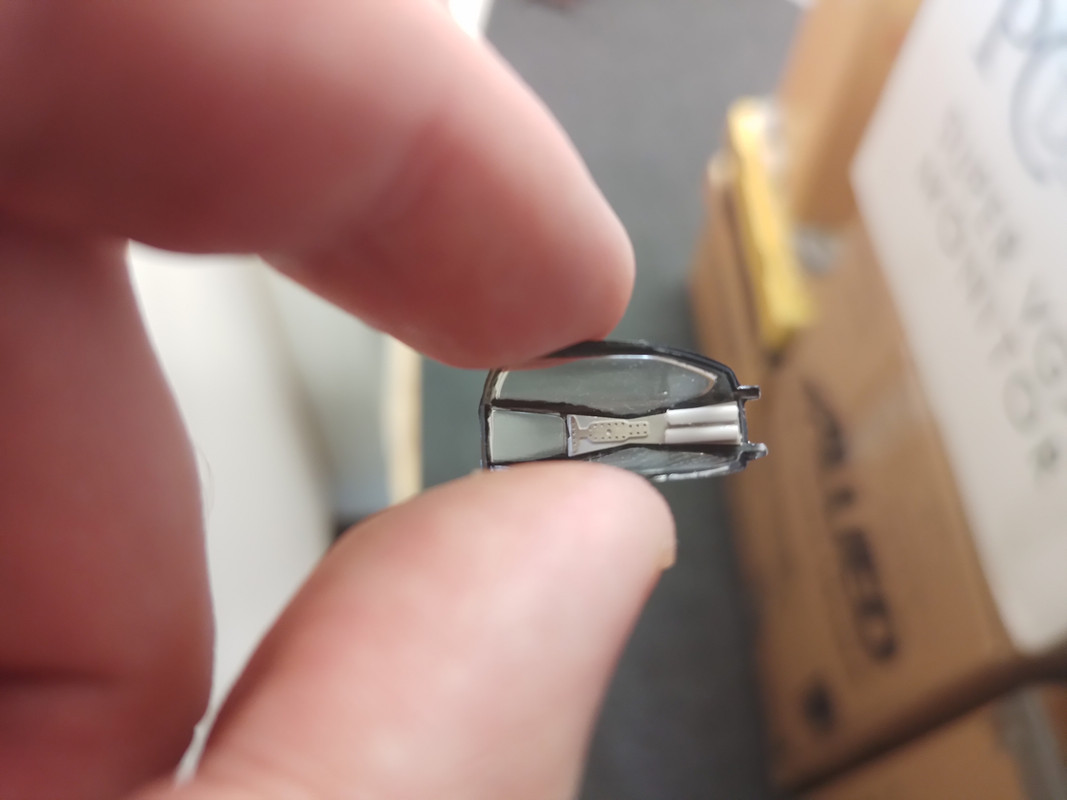
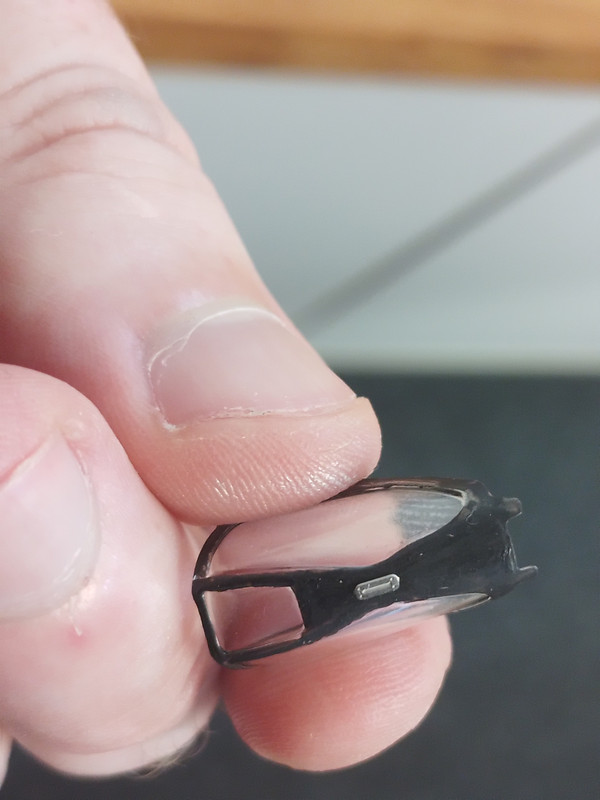
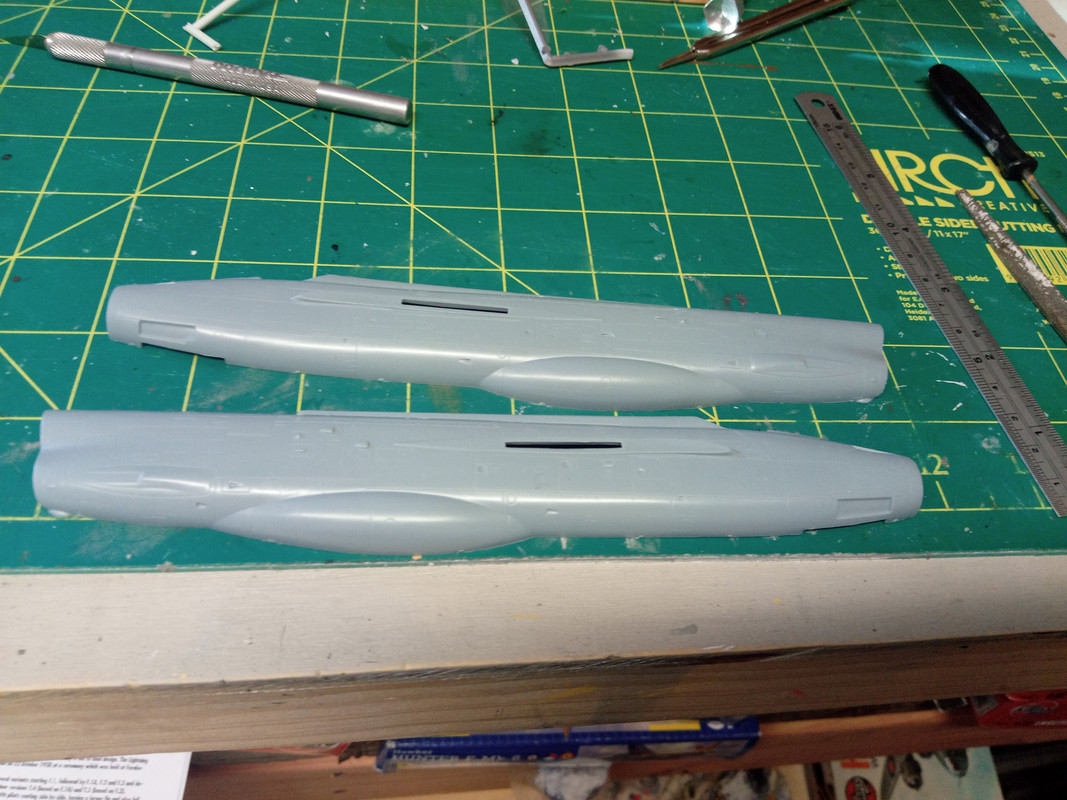
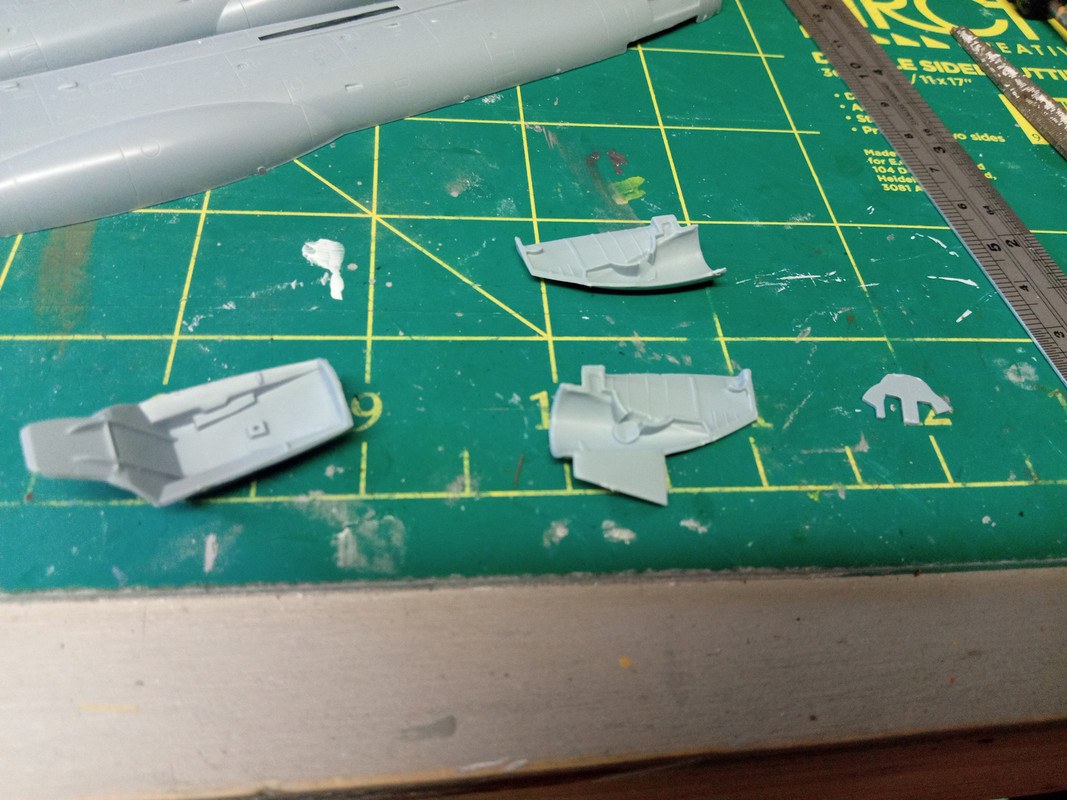
This is a 'limited run' kit meaning that it was never intended to be mass produced. The moulds are usually softer and in general, a lot less refined. There are no locating pins and often, a bit of scratch building. The plugs here have obliterated the top of the undercarriage bay. Not sure how extreme I'll go to fix it yet.

Image
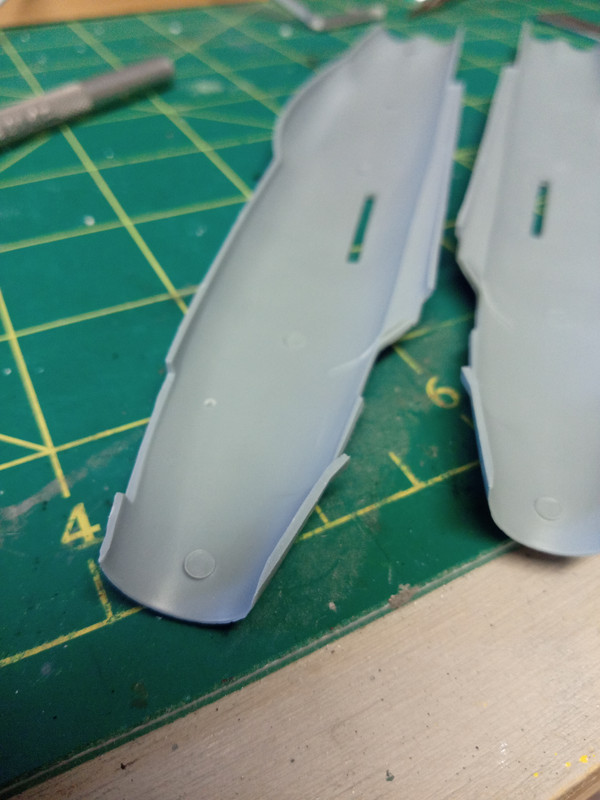
Note the plugs that'll have to be removed.
User avatar
chopper_nut
NZFF Pro
 
Topic author
Joined: Wed Oct 25, 2006 9:58 pm
Posts: 2977
Location: Wherever the work is

Re: EE Lightning Build 1/72. Warning: Pic Heavy

Postby Splitpin » Mon Jul 04, 2022 6:59 pm

Looking good Nick...I will start something this weekend and post the progress.
User avatar
Splitpin
NZFF Pro
 
Joined: Mon Aug 03, 2009 12:15 pm
Posts: 21330
Location: Christchurch NZ

Re: EE Lightning Build 1/72. Warning: Pic Heavy

Postby chopper_nut » Mon Jul 04, 2022 7:07 pm

Please do
User avatar
chopper_nut
NZFF Pro
 
Topic author
Joined: Wed Oct 25, 2006 9:58 pm
Posts: 2977
Location: Wherever the work is

Re: EE Lightning Build 1/72. Warning: Pic Heavy

Postby chopper_nut » Tue Jul 05, 2022 2:46 pm

Started in earnest on the interior today. First thing was to put some black down for the interior. The F1s were black inside but the F2s onwards were what is called Admiralty Grey.

Image
Out with the Dremel to grind off the lugs inside the intake. I may do some more later.

I decided to 'fix' the undercarriage bay. Not too flash but it'll hardly be seen. You could get away with not doing this. Just a bit of plastic card on each half and the hole filled in with Vallejo filler. They go together pretty well now.

Image

This is my first time doing photo etch and it is a bit of an exercise in frustration as the parts are very small and need to be attached with superglue. There are guys who use floor polish but I couldn't get this to work. If you're building one of your first kits and it has PE, don't even bother with it. The vast majority of kits out there look just fine without it and I'm only doing it as an exercise to see if I can.

Image
Folding a flat bit over for instrumentation under the combing.

Image
With the coloured PE attached.

Image
Combing complete except for a small part that I managed to loose. The disc on the top will have the radar screen attached eventually.

Image
Completed instrument panel.

Image
Cockpit tub with sidewalls completed. I nearly didn't put the rudder pedals in but I did it just as an experiment. They'll probably be hidden in the end.
User avatar
chopper_nut
NZFF Pro
 
Topic author
Joined: Wed Oct 25, 2006 9:58 pm
Posts: 2977
Location: Wherever the work is

Re: EE Lightning Build 1/72. Warning: Pic Heavy

Postby K5054NZ » Tue Jul 05, 2022 2:58 pm

Looking terrific, Nick! It's nice to see you taming the PE.
User avatar
K5054NZ
Senior Member
 
Joined: Sun Jul 30, 2006 4:53 pm
Posts: 1036
Location: NZOM

Re: EE Lightning Build 1/72. Warning: Pic Heavy

Postby chopper_nut » Tue Jul 05, 2022 6:19 pm

I don't know about that...
User avatar
chopper_nut
NZFF Pro
 
Topic author
Joined: Wed Oct 25, 2006 9:58 pm
Posts: 2977
Location: Wherever the work is

Re: EE Lightning Build 1/72. Warning: Pic Heavy

Postby chopper_nut » Thu Jul 07, 2022 12:58 pm

Not much work done over the last couple of days, it's been too cold to be in the garage. I did manage to get the radar bullet together though.

Image
Image
Not particularly tidy but neither is the mass produced Airfix one and the nose gear bay is so narrow that you'll never see it in there.

Test fitting the bullet showed that it needed a small shim. Out with the plastic scraps just so that it'll touch the top of the fuselage.
Image
Image
Needs a trim to fit properly but it's mostly there.
User avatar
chopper_nut
NZFF Pro
 
Topic author
Joined: Wed Oct 25, 2006 9:58 pm
Posts: 2977
Location: Wherever the work is

Re: EE Lightning Build 1/72. Warning: Pic Heavy

Postby chopper_nut » Sat Jul 09, 2022 2:45 pm

It's been a bit cold to be in the garage over the last few days but I managed to make some progress this morning.

Image
Image
Fitted the first bit of nose weight into the radar bullet and then thinned out the shock cone a little to fit over the top. The rest of the weight will go behind the cockpit

Image
Cockpit tub fitted and it seems to be about right. A little guesswork required here as there aren't very good guides on the kit.

Image
I then decided to fit the cannon panels to the fuselage. The kit comes with the options for an F1 or an F2 (or an F1a). The F1s were two gun aircraft whereas the F2s could be fitted with four, two top and two bottom. The kit has blanking plates for the two gun aircraft. The top panels for the F1 have the port depth moulded which has made the part quite deep. Word to the beginners, don't put glue on anything until you're relatively sure it'll fit.

Image
A bit of work with the sandpaper and file later...

Image
And then some more work with the filler and sandpaper later... Thankfully I managed to keep most of the surface detail.

Image
Shock cone attached to the radar bullet. A bit more tidy up and then it'll be ready for painting.
User avatar
chopper_nut
NZFF Pro
 
Topic author
Joined: Wed Oct 25, 2006 9:58 pm
Posts: 2977
Location: Wherever the work is

Re: EE Lightning Build 1/72. Warning: Pic Heavy

Postby chopper_nut » Wed Jul 13, 2022 12:57 pm

Moved onto the wings for a bit this morning.

Image
Out with the dremel to remove the enormous injection plugs. Undercarriage bays required a little bit of work with the knife but overall pretty good

Image
Shock cone and radar bullet installed in the fuselage. Not the perfect fit but on reflection, I think I know what I need to do for the next one. Painting looks very poor but I'm not concerned as it's all hidden once the fuselage is together.
User avatar
chopper_nut
NZFF Pro
 
Topic author
Joined: Wed Oct 25, 2006 9:58 pm
Posts: 2977
Location: Wherever the work is

Re: EE Lightning Build 1/72. Warning: Pic Heavy

Postby chopper_nut » Fri Jul 15, 2022 2:46 pm

Forging ahead with this build. Had to add some plastic card along the joins to make it easier to join the two fuselage halves together and then took the plunge and stuck them together.

Image
Turns out that one halve is deeper than the other so a fair amount of cleanup was required to get rid of the seam along the tank and fuselage

Image
Modellers would be knackered without wet and dry sandpaper...

Image
Attached the tail and the little bit behind the cockpit. Some more filler around the base of the tail and also around the inside of the nose gear bay.
Found out after the tail was on that the part was bowed outward.... had to submerge the tail in hot water to bend it back. Fun and games...
User avatar
chopper_nut
NZFF Pro
 
Topic author
Joined: Wed Oct 25, 2006 9:58 pm
Posts: 2977
Location: Wherever the work is

Re: EE Lightning Build 1/72. Warning: Pic Heavy

Postby Splitpin » Sat Jul 16, 2022 4:32 pm

Looking good Nick. I haven't had a chance to start anything yet, I've been dealing with a few things on the home and work front.
But I will soon.
User avatar
Splitpin
NZFF Pro
 
Joined: Mon Aug 03, 2009 12:15 pm
Posts: 21330
Location: Christchurch NZ

Re: EE Lightning Build 1/72. Warning: Pic Heavy

Postby chopper_nut » Mon Jul 18, 2022 3:48 pm

Go for it Marty, I'm looking forward to watching what you do.

A little progress on the Lightning over the last few days.

Image
Resin exhaust thinned out at the top to achieve a better fit into the fuselage. This was done with the dremel and is the one time in life I would recommend that EVERYONE wears a mask. Resin dust is kind of like asbestos on the lungs so even if you're hand sanding resin, wear a mask and try to do it outside.

Image
Backing plate on the exhausts. Not much effort required, you can barely see down there.

Image
Not glued in but the fit isn't too bad now.

Image
Wings are coming together now, not a great fit but good enough to get them together and start cleaning up.

Slow progress sometimes but when you take everything slowly and methodically, you do get somewhere.
User avatar
chopper_nut
NZFF Pro
 
Topic author
Joined: Wed Oct 25, 2006 9:58 pm
Posts: 2977
Location: Wherever the work is

Re: EE Lightning Build 1/72. Warning: Pic Heavy

Postby Splitpin » Tue Jul 19, 2022 5:34 pm

Great to watch the progress Nick, and a great heads up regarding the resin dust, I had no idea.
User avatar
Splitpin
NZFF Pro
 
Joined: Mon Aug 03, 2009 12:15 pm
Posts: 21330
Location: Christchurch NZ

Re: EE Lightning Build 1/72. Warning: Pic Heavy

Postby chopper_nut » Sat Jul 23, 2022 2:38 pm

Made a little bit of progress over the last couple of days

Image
Resin exhaust attached and filled

Image
Probably can't see it but there's PE in the gear bay and I had to build a shim for the end of the flap to get it to mate with the fuselage.

Image
All together. Just have to fill around the tailplane and clean up the wing roots.

Image
Current state of the cockpit.
User avatar
chopper_nut
NZFF Pro
 
Topic author
Joined: Wed Oct 25, 2006 9:58 pm
Posts: 2977
Location: Wherever the work is

Re: EE Lightning Build 1/72. Warning: Pic Heavy

Postby chopper_nut » Mon Jan 30, 2023 3:20 pm

After a long absence due to work, I'm back into building the Lightning.

Image
After a bit of a cleanup, I started laying down some Humbrol 27002 which is their 'Polished Aluminium' It's not an easy thing to brush on, it needs several thin coats and one has to be quite careful as metallics and lighter colours tend to show up any 'bits' in the paint. It also takes an age to dry properly. I believe that this is a pretty good approximation for the finish on the bare metal Lightnings. Some panels will be different colours and finishes.

Image
Also made a start on the canopy. The canopy framing on all Lightnings was black on the outside and on the F1/F1As black on the inside. The kit came with a bit of photo etch for the inside which I've used and there is also a mirror for the front which will go on at the end. The white tubes are part of the mechanism for the canopy. There'll be some more tubing added later.

Image
Paint looks a bit rough there but I've subsequently tidied it up. The little bit of PE is the IFF aerial mount which will be black.

Image
Early Lightnings up to the 1970s carried Firestreak missiles whereafter they were superseded by DH Redtops. The kit requires four of the eight fins to be added which is annoying. If I'd thought a bit more, I would've stolen the Firestreaks from the Airfix F6 which will be unarmed when I've built it.

Although there is a bit of photo etch and scratch building here, the kit (any kit) can be built to a perfectly satisfactory standard without any of that. I do this to myself because I'm insane.
Last edited by chopper_nut on Tue Jan 31, 2023 4:27 pm, edited 1 time in total.
User avatar
chopper_nut
NZFF Pro
 
Topic author
Joined: Wed Oct 25, 2006 9:58 pm
Posts: 2977
Location: Wherever the work is

Re: EE Lightning Build 1/72. Warning: Pic Heavy

Postby Splitpin » Tue Jan 31, 2023 3:57 pm

" I do this to myself because I'm insane." ...stay that way Nick, I enjoy your posts and tips.
Looking good :thumbup:
User avatar
Splitpin
NZFF Pro
 
Joined: Mon Aug 03, 2009 12:15 pm
Posts: 21330
Location: Christchurch NZ

Re: EE Lightning Build 1/72. Warning: Pic Heavy

Postby chopper_nut » Tue Jan 31, 2023 4:57 pm

I drew the line at folding the photo etch hinges for the gear doors today :lol:

Not much in the way of visible progress on the Lightning today, painting the gear doors and touching up parts of the fuselage. I did add the PE dogbone links to the gear legs.

Image
User avatar
chopper_nut
NZFF Pro
 
Topic author
Joined: Wed Oct 25, 2006 9:58 pm
Posts: 2977
Location: Wherever the work is

Re: EE Lightning Build 1/72. Warning: Pic Heavy

Postby chopper_nut » Thu Feb 02, 2023 3:11 pm

Lots of painting going on over the last few days. Bought a paint marker from Ironhorse for the shiny bit which seems to have worked surprisingly well.

Image
Masked up the gun ports for painting and then realized that I'd done a lousy job with the filler. Oh well.

Image
Tamiya masking tape is great stuff. All of the panels that'll be different colours / shades

Image
Hard to capture but the intake ring looks quite good. Much better than I was able to paint on the previous Lightning.
User avatar
chopper_nut
NZFF Pro
 
Topic author
Joined: Wed Oct 25, 2006 9:58 pm
Posts: 2977
Location: Wherever the work is

Re: EE Lightning Build 1/72. Warning: Pic Heavy

Postby Splitpin » Thu Feb 02, 2023 4:35 pm

Looking good Nick .... :thumbup:
User avatar
Splitpin
NZFF Pro
 
Joined: Mon Aug 03, 2009 12:15 pm
Posts: 21330
Location: Christchurch NZ

Re: EE Lightning Build 1/72. Warning: Pic Heavy

Postby chopper_nut » Sat Feb 04, 2023 4:11 pm

Work continues on this project in the mornings before it gets too hot. Most of the hard work on the painting is done now with just touch ups to do, finishing painting the fuel tank, painting the exhausts and of course, painting the spine and tail.

Image

The aircraft is going to represent XM137, an early production F1 of 74 Squadron at Coltishall. 74 were the first Lightning operators so the F1 should be one of theirs.

Image
XM137 at Coltishall in July 1963. Photo by Jim Cain

The photo shows the aircraft to be highly reflective which is an effect next to impossible without exotic paints and an airbrush. I think the finish that I have is a good compromise.
Last edited by chopper_nut on Sun Feb 05, 2023 9:34 am, edited 1 time in total.
User avatar
chopper_nut
NZFF Pro
 
Topic author
Joined: Wed Oct 25, 2006 9:58 pm
Posts: 2977
Location: Wherever the work is

Next

Return to Off Topic

Who is online

Users browsing this forum: No registered users and 11 guests