Ian Warren wrote:QUOTE (Ian Warren @ Mar 29 2010, 11:42 AM) <{POST_SNAPBACK}>So far a Supreme effort , I did mention floodgate off photos , hmm , there where so many people with Hi-res photos a few years back , i do wonder were they have disappeared .
I may have a couple on my desktop PC, I'll have a look tonight.
RNZAF Beech Super King Air 300?
67 posts
• Page 2 of 4 • 1, 2, 3, 4
![]() by mavman » Mon Mar 29, 2010 12:29 pm
by mavman » Mon Mar 29, 2010 12:29 pm
-

mavman - Forum Addict
- Joined: Sun Apr 30, 2006 7:27 pm
- Posts: 320
- Location: Dunedin
![]() by Wildbillkelso » Tue Mar 30, 2010 2:29 am
by Wildbillkelso » Tue Mar 30, 2010 2:29 am
Well, these wings do have to be grey. You've convinced me! 
Too bad that this paint kit is intended for white wings only (wing colour and rivets/panel lines on one common layer only) - some additional work to be done...
But which grey?
I've eyedropped it from a photo, but would love to take the true RGB values for that grey.
Maybe the RAF Light aircraft grey (FS595b-36424 or -36440) should do.
Can anyone confirm these specifications?
Over the time of repainting, I've collected several colours lists of USAAF/USAF/USN/RAF/RCAF/GAF aircraft paintings, but haven't found anything about RNZAF colour specifications...
@ Sean:
Thanks again for your help!
NZ1881 wears the earlier scheme (wide light blue cheatline with roundel blue outlines) which looks fine too - worth a second release...
Cheers,
Markus.

-
Wildbillkelso - Forum Addict
- Topic author
- Joined: Fri Feb 19, 2010 7:58 pm
- Posts: 361
- Location: Berlin, Germany
![]() by Charl » Tue Mar 30, 2010 8:54 am
by Charl » Tue Mar 30, 2010 8:54 am
OK maybe I was not explicit enough, earlier in this thread.
Steve Jenks - MASTER PAINTER - and an absolute stickler for detail, has produced an AI repaint.
Even if the final flattened BMP is DXT3, everything is correct:
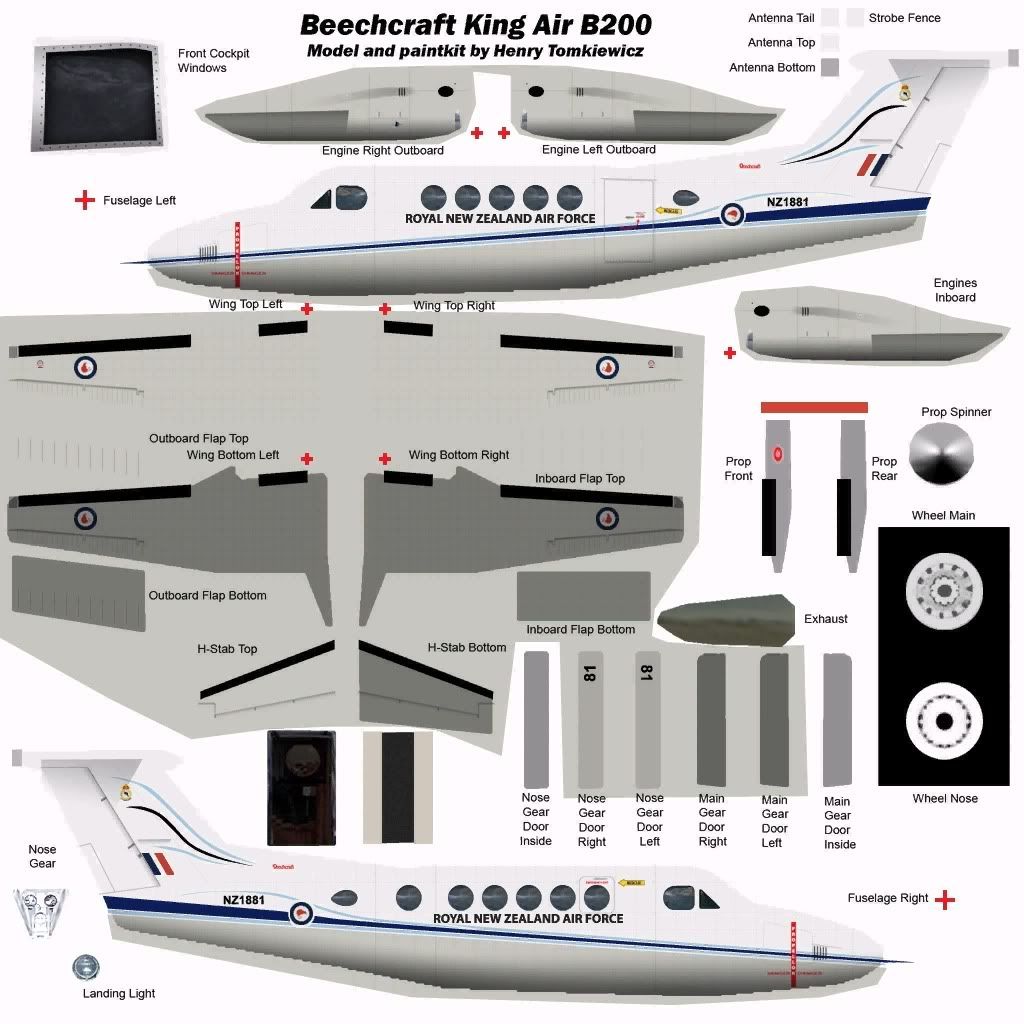
Steve Jenks - MASTER PAINTER - and an absolute stickler for detail, has produced an AI repaint.
Even if the final flattened BMP is DXT3, everything is correct:
-

Charl - NZFF Pro
- Joined: Mon May 01, 2006 8:28 am
- Posts: 9691
- Location: Auckland
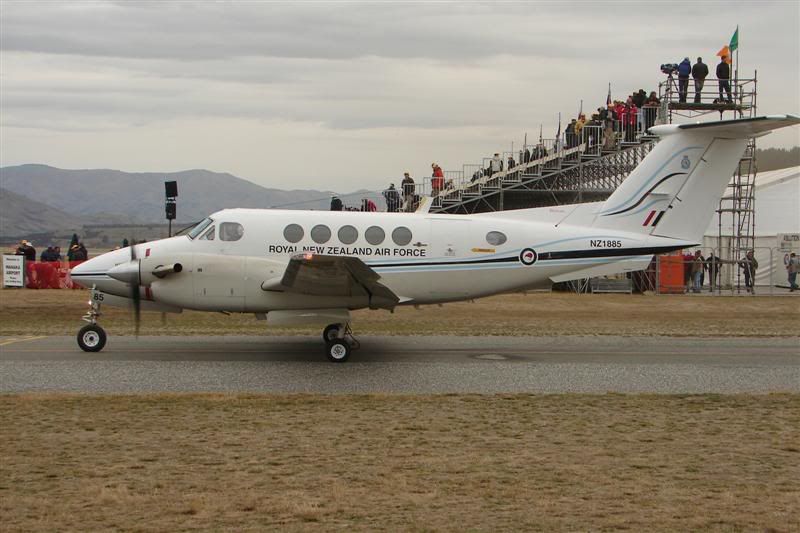
![]() by Trev » Tue Mar 30, 2010 3:42 pm
by Trev » Tue Mar 30, 2010 3:42 pm
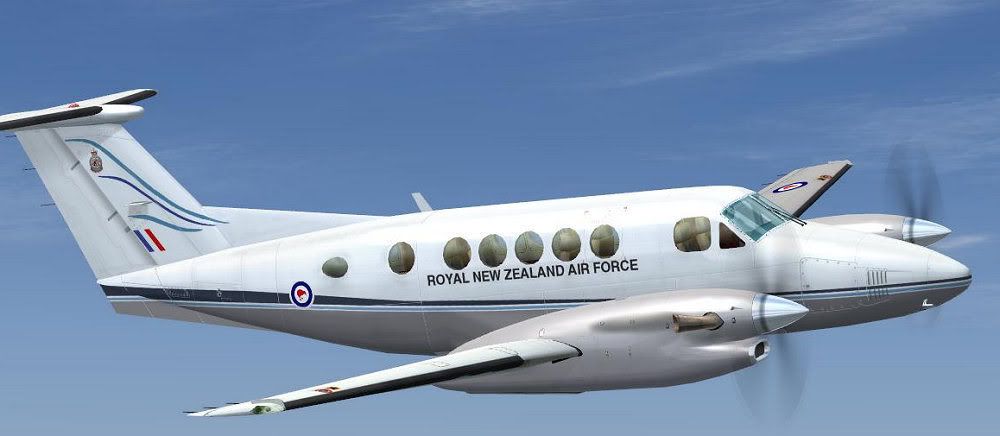
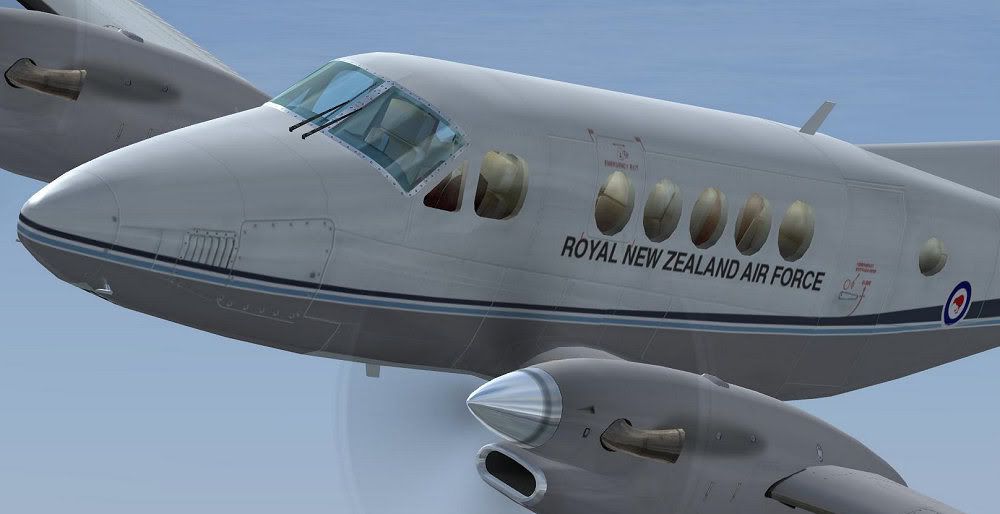
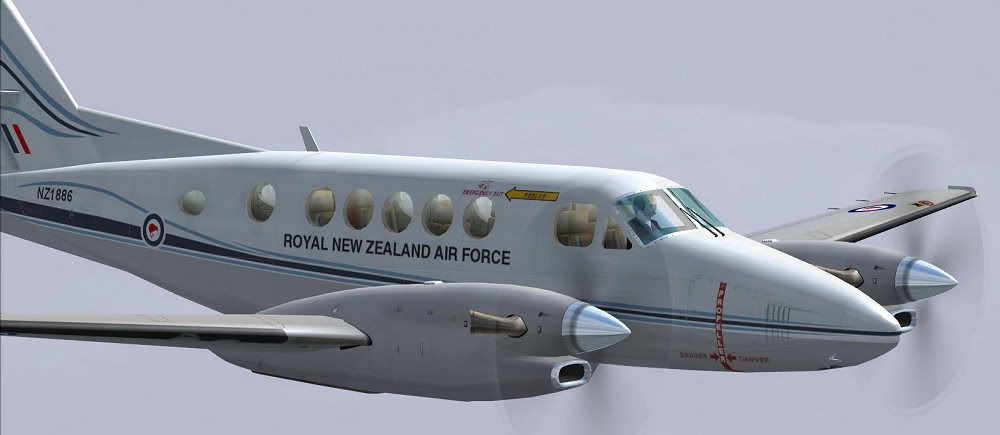
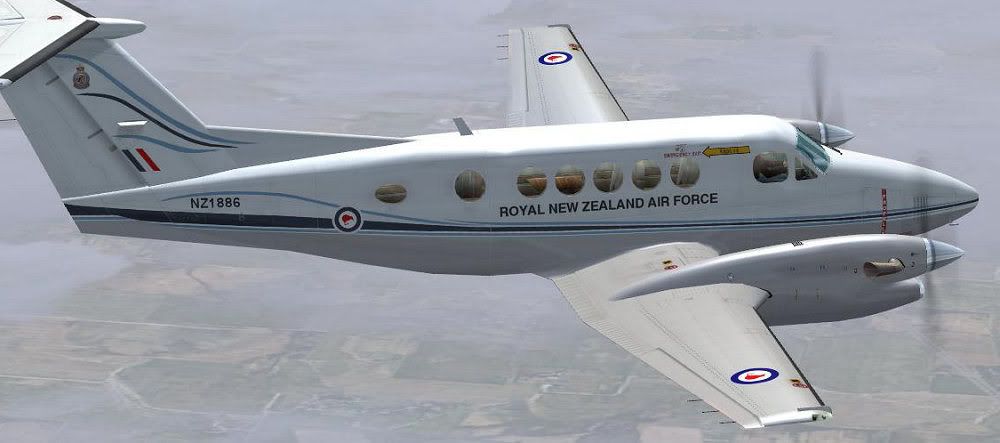
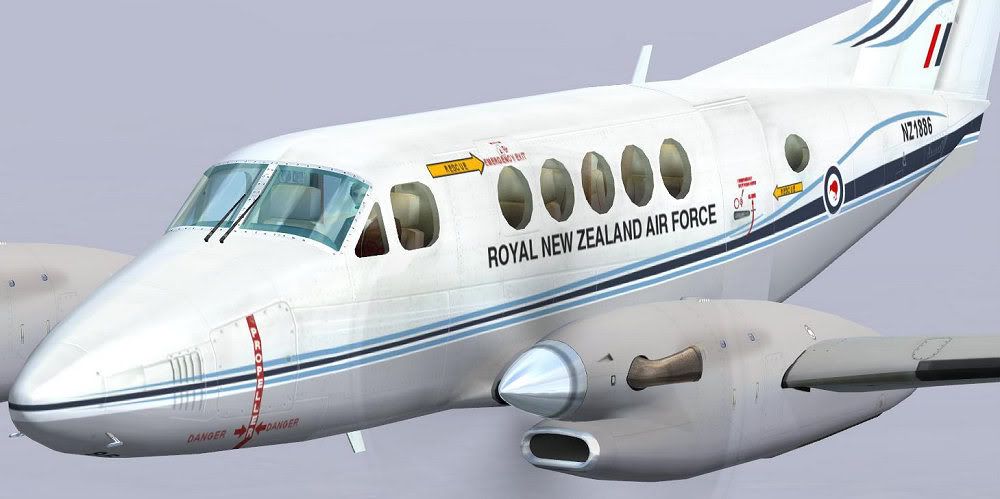
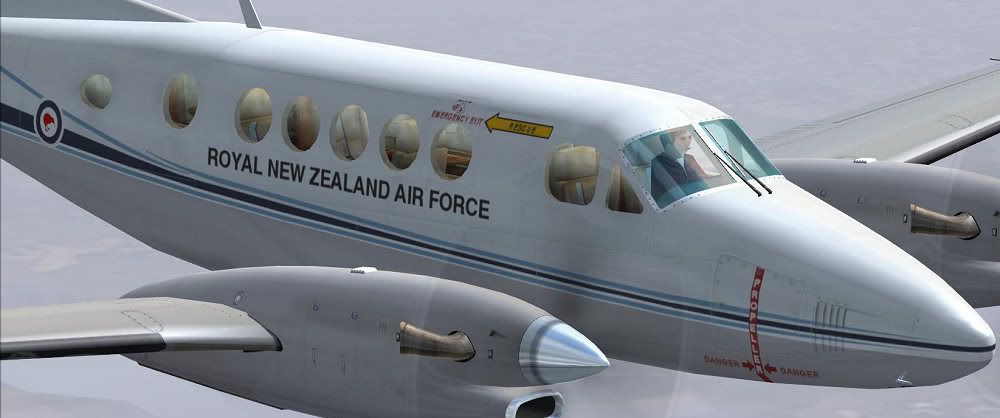
The lower fuselage, both upper and lower wing surfaces are all FS 16440 grey
The fuselage light blue is FS15450
The Fuselage Dark blue is FS15044 - which is also the same colour as the dark blue in the Roundel and fin Flash.
Heres a side on view

The fuselage light blue is FS15450
The Fuselage Dark blue is FS15044 - which is also the same colour as the dark blue in the Roundel and fin Flash.
Heres a side on view
Last edited by Trev on Tue Mar 30, 2010 3:44 pm, edited 1 time in total.
- Trev
- Member
- Joined: Wed Sep 17, 2008 6:22 pm
- Posts: 101
- Location: Ohakea
![]() by Wildbillkelso » Wed Mar 31, 2010 2:54 am
by Wildbillkelso » Wed Mar 31, 2010 2:54 am
Charl wrote:QUOTE (Charl @ Mar 30 2010, 09:54 AM) <{POST_SNAPBACK}>OK maybe I was not explicit enough, earlier in this thread.
Steve Jenks - MASTER PAINTER - and an absolute stickler for detail, has produced an AI repaint.
Ooops - I must confess not having taken this one into account yet!
This repaint is impressive for sure, just downloaded.
I think I'll blow it up to a handy size and redraw all the lines following this template!
Thanks for reminding me, mate!
@ mavman:
Nice reference too, thank you!
I already took one of those "full side" shots, resized and copied it as a layer to the repaint set to redraw the lines in my first attempt.
Trev, you made my day!
This is an awesome reference!
I sincerely hope that there'll be no concerns about menacing your national security when sharing this sheet with us (seems quite official to me...).
Even the starting points of the ribbon's tapering are marked - it's incredible!
Now I really have something to play around with.
Thank you all!
Cheers,
Markus.
-
Wildbillkelso - Forum Addict
- Topic author
- Joined: Fri Feb 19, 2010 7:58 pm
- Posts: 361
- Location: Berlin, Germany
![]() by Charl » Wed Mar 31, 2010 8:32 am
by Charl » Wed Mar 31, 2010 8:32 am
Wildbillkelso wrote:QUOTE (Wildbillkelso @ Mar 31 2010, 03:54 AM) <{POST_SNAPBACK}>Ooops - I must confess not having taken this one into account yet!
This repaint is impressive for sure, just downloaded.
I think I'll blow it up to a handy size and redraw all the lines following this template!
Thanks for reminding me, mate!...
Of course, Steve had to work within the constraints of the AI model, which, while pretty good, is not 100% accurate.
I don't know if the one you are painting is - but that's a painter's life, fudging the details so it all becomes believable!
Another complication is that while RNZAF aircraft purport to be the same grey, in life they are anything but.
The KingAir upper surfaces are definitely faded from the FS16440 original, while under surfaces are less so.
I think Steve hit a nice balance - in the sim I reckon they look pretty much like videos I have shot of the real deal.
So Markus, there's a real challenge for you: make a paint that looks like the real thing!
-
Charl - NZFF Pro
- Joined: Mon May 01, 2006 8:28 am
- Posts: 9691
- Location: Auckland
![]() by Wildbillkelso » Thu Apr 01, 2010 12:43 am
by Wildbillkelso » Thu Apr 01, 2010 12:43 am
Charl wrote:QUOTE (Charl @ Mar 31 2010, 09:32 AM) <{POST_SNAPBACK}>Of course, Steve had to work within the constraints of the AI model, which, while pretty good, is not 100% accurate.
I don't know if the one you are painting is - but that's a painter's life, fudging the details so it all becomes believable!
There are some small deviations between the line drawing Trev kindly provided and the AFG model wireframe (window's position, tailcone, wing roots).
The tail strakes are of course completely different (the most obvious difference between the 200 and 300 model, IIRC).
The blue ribbons Steve applied for the AI model go "straight" from tip to tail, whereas the real ones definately have to be curved. But working with Steve's template and the resized line drawing as seperate layers to re-create the vector lining by hand upon them, seems to work quite fine. First results coming up soon!QUOTEThe KingAir upper surfaces are definitely faded from the FS16440 original, while under surfaces are less so.[/quote]
AFG provided fine shadow layers for the lower parts, so adjusting an appropriate shading won't be too hard...QUOTE...there's a real challenge for you: make a paint that looks like the real thing![/quote]
Yep. This time, "poor reference material" won't be an excuse...
Cheers,
Markus.
Wildbillkelso- Forum Addict
- Topic author
- Joined: Fri Feb 19, 2010 7:58 pm
- Posts: 361
- Location: Berlin, Germany
![]() by Wildbillkelso » Thu Apr 01, 2010 3:45 am
by Wildbillkelso » Thu Apr 01, 2010 3:45 am
Well, I think the new vector-drawn lines are way better so far (besides some small adjustment issues). The upper light blue ribbon is still missing:

Funny thing about the gray belly:
I used the original RGB values of FS16440 ("light gull"), but compared to the photos it looks some notches too dark, don't you think?
Maybe it's better to fade it some more...
The roundel blue of course has to be changed to FS15044.
Funny thing about the gray belly:
I used the original RGB values of FS16440 ("light gull"), but compared to the photos it looks some notches too dark, don't you think?
Maybe it's better to fade it some more...
The roundel blue of course has to be changed to FS15044.
-
Wildbillkelso - Forum Addict
- Topic author
- Joined: Fri Feb 19, 2010 7:58 pm
- Posts: 361
- Location: Berlin, Germany

![]() by Charl » Thu Apr 01, 2010 7:52 am
by Charl » Thu Apr 01, 2010 7:52 am
Wildbillkelso wrote:QUOTE (Wildbillkelso @ Apr 1 2010, 04:45 AM) <{POST_SNAPBACK}>...
Funny thing about the gray belly:
I used the original RGB values of FS16440 ("light gull"), but compared to the photos it looks some notches too dark, don't you think?
Maybe it's better to fade it some more...
...
It's the sun....NZ has one of the harshest sun environments in the world for some reason.
It's murder on paint, and bleaches out the blue...
It's looking very promising though, and as an aside:
I also own the Aeroworx bird, and would love to see this livery on there.
Time to go hunting for a volunteer and bring him here...
-
Charl - NZFF Pro
- Joined: Mon May 01, 2006 8:28 am
- Posts: 9691
- Location: Auckland
![]() by Wildbillkelso » Sun Apr 04, 2010 5:03 am
by Wildbillkelso » Sun Apr 04, 2010 5:03 am
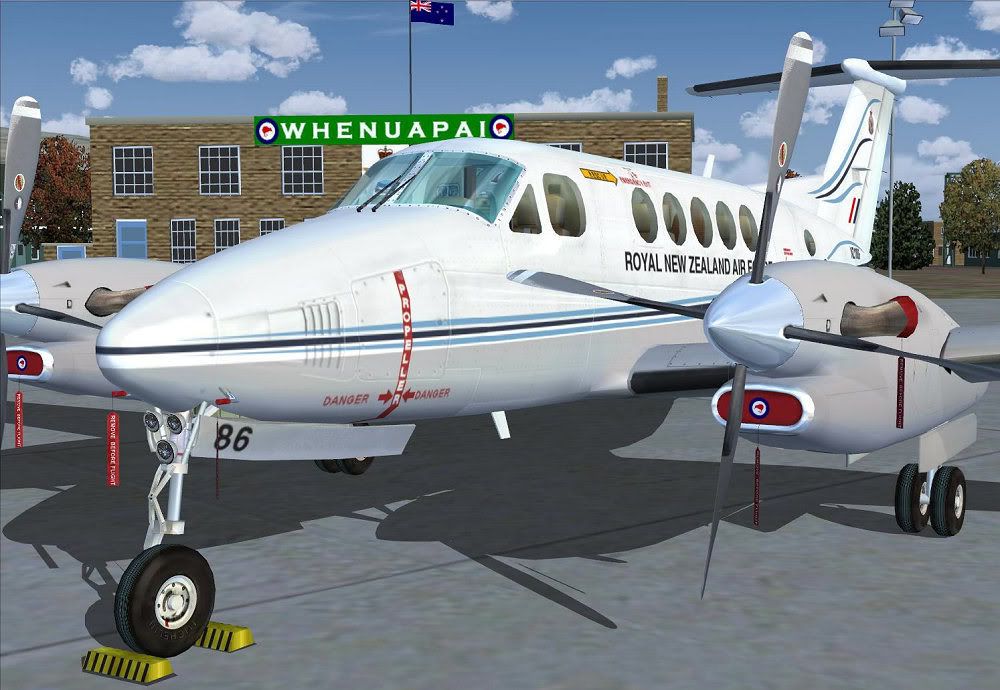
Time for constructive critizism!
Status:
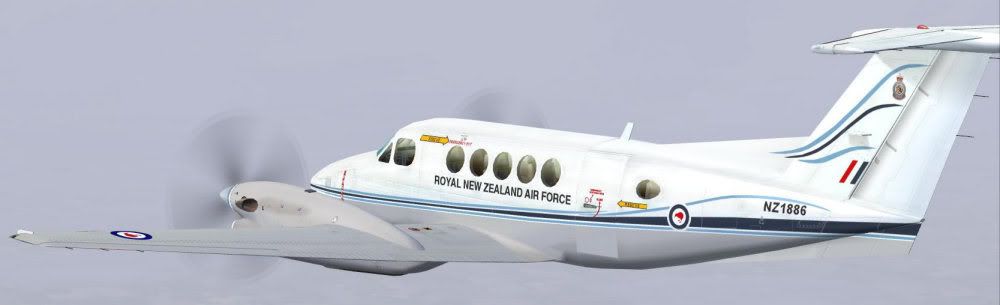
Please take a good look at it - anything left or to be improved?
Cheers,
Markus.
Status:
Please take a good look at it - anything left or to be improved?
Cheers,
Markus.
-
Wildbillkelso - Forum Addict
- Topic author
- Joined: Fri Feb 19, 2010 7:58 pm
- Posts: 361
- Location: Berlin, Germany
![]() by SeanTK » Sun Apr 04, 2010 6:57 am
by SeanTK » Sun Apr 04, 2010 6:57 am
That is a quite stunning piece of work!
Going into super-ultra-picky mode: It's probably not something that is fixable, but I noticed that the gray part of the passenger door is a lighter shade than the gray on the rest of the plane. Also, it looks like parts of the de-ice boots got splattered with gray paint on the underside, but it may just be the angle....
Other than that questionable issue, it looks fantastic!
Last edited by SeanTK on Sun Apr 04, 2010 6:59 am, edited 1 time in total.
-

SeanTK - Senior Member
- Joined: Sun Feb 28, 2010 9:27 am
- Posts: 1617


![]() by Wildbillkelso » Sun Apr 04, 2010 8:06 pm
by Wildbillkelso » Sun Apr 04, 2010 8:06 pm
Thanks, guys!
I'll take a look at the deicers (your special item, Sean? ).
The shade of the door is due to the model - seems like it has a slight deviating curve from the fuselage, so it reflects different. Doesn't happen on the shadow side...
I think the rescue arrows still need some resizement (too big at the escape hatches), but the major work seems to be done.
Cheers,
Markus.
I'll take a look at the deicers (your special item, Sean?
).The shade of the door is due to the model - seems like it has a slight deviating curve from the fuselage, so it reflects different. Doesn't happen on the shadow side...
I think the rescue arrows still need some resizement (too big at the escape hatches), but the major work seems to be done.
Cheers,
Markus.
-
Wildbillkelso - Forum Addict
- Topic author
- Joined: Fri Feb 19, 2010 7:58 pm
- Posts: 361
- Location: Berlin, Germany
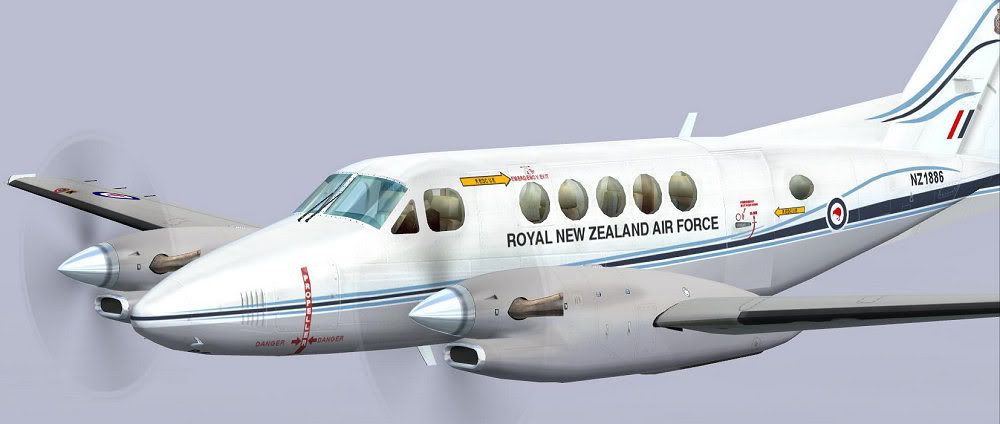
![]() by Wildbillkelso » Mon Apr 05, 2010 5:13 am
by Wildbillkelso » Mon Apr 05, 2010 5:13 am
Sean, the deicers are okay:
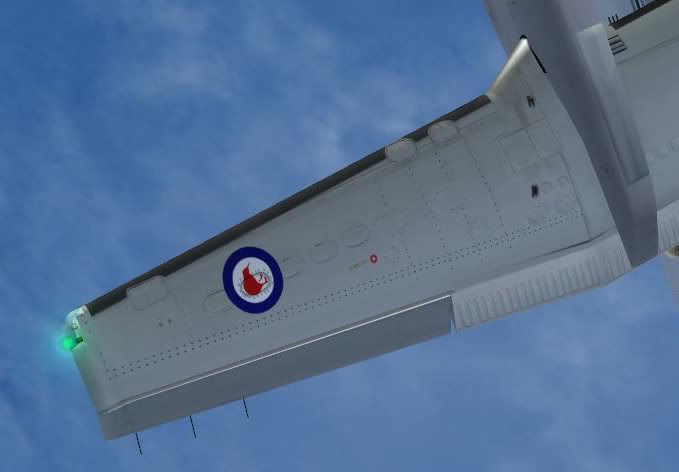
There are access panels in these areas, leaving out the coating. Don't mind the roundel's placement, see below!
Final evaluation hop around Snowman's amazing Whenuapai was done:
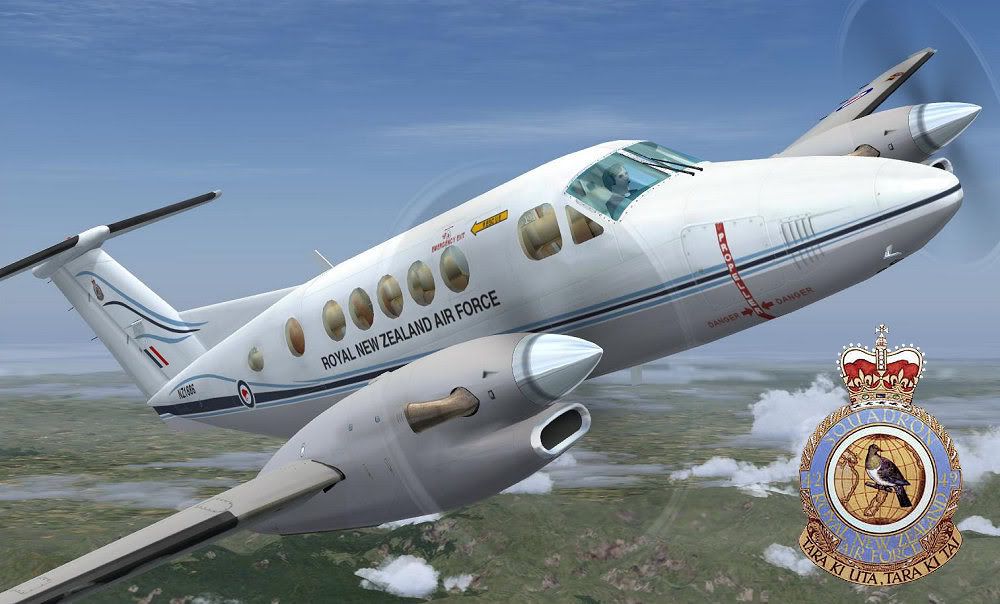
Even the prop blade tips sport the correct coulour now:
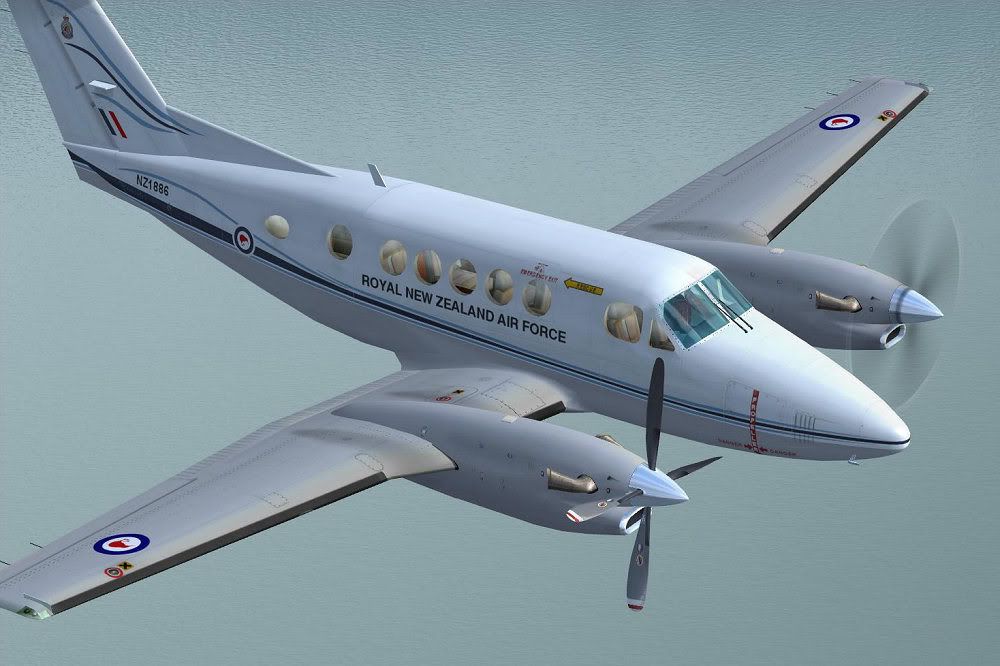
Note the roundels placed correctly now, centered to the wing's depth.
Anything left?
There are access panels in these areas, leaving out the coating. Don't mind the roundel's placement, see below!
Final evaluation hop around Snowman's amazing Whenuapai was done:
Even the prop blade tips sport the correct coulour now:
Note the roundels placed correctly now, centered to the wing's depth.
Anything left?
-
Wildbillkelso - Forum Addict
- Topic author
- Joined: Fri Feb 19, 2010 7:58 pm
- Posts: 361
- Location: Berlin, Germany

![]() by deaneb » Mon Apr 05, 2010 10:56 am
by deaneb » Mon Apr 05, 2010 10:56 am
The repait looks superb!! The only things I can see that may need looking at. The roundels on the wing, the blue is not dark enough - should be same dark blue as used on the fuse. Also the de-ice boots, would not be cut out to fit around the access panels. From pics I can see the boots are straight. That aside it really looks great.

-
deaneb - Senior Member
- Joined: Sat Aug 12, 2006 4:40 pm
- Posts: 1561
- Location: Blenheim
![]() by Wildbillkelso » Mon Apr 05, 2010 8:24 pm
by Wildbillkelso » Mon Apr 05, 2010 8:24 pm
Thanks for your remarks, Deane!
I've already fixed the fuselage roundel's blue to FS15044 but forgot the wing roundels - glad you mentioned it.
Here's the clue about the leading edge coating:
http://www.airliners.net/photo/New-Zealand...uper/0817766/L/
Overexposing this pic, it shows that the outer access panel in fact is left out, whereas the inner ones (towards the nacelle) are coated black.
Strange thing ... maybe NZ1881 from the pic once received spare panels without coating?
I'll fix that!
-
Wildbillkelso - Forum Addict
- Topic author
- Joined: Fri Feb 19, 2010 7:58 pm
- Posts: 361
- Location: Berlin, Germany
67 posts
• Page 2 of 4 • 1, 2, 3, 4
Who is online
Users browsing this forum: No registered users and 12 guests